Introduction
AI can draft code from trading rules, but generated code still needs inspection and testing. This historical walkthrough documents a February 2025 BotSpot and Replit workflow using an RSI swing-trading example. The screenshots and interface labels describe that version; they are not current signup or deployment instructions.
BotSpot now offers paid software subscriptions. For the current managed workflow, use the Current AI trading bot guide and current plans. Neither AI-generated rules nor a favorable backtest establishes that a strategy will make money.
Why This Matters
Use AI to translate rules, then check the code, data timing, sizing, costs and trade behavior. The example below is educational; TQQQ is a leveraged ETF and is not a recommendation. Simulated results do not establish future returns or live readiness.
Topics We'll Explore in This Article
- AI-Assisted Strategy Code – Draft code from plain-English rules and inspect what it does.
- Building a Swing Trading Bot Step-by-Step – Follow our exact process to specify a strategy and inspect generated code.
- Revising a Defined Hypothesis – Record changes to indicators and parameters without mistaking repeated tuning for validation.
- Historical Replit Workflow – See the original code, configuration and backtest-file steps.
- Taking It Live on Alpaca – Get your bot trading in real markets, fully automated.
- Next Steps & Additional Resources – Explore advanced features, training options, and community support to level up your skills.
Build a Swing Trading Bot with AI: A Historical Walkthrough
The original example starts with an RSI rule, generates Python code, and compares simulated outputs after a revision. Preserve the original specification and results so each change can be understood. A later test on unseen data is a separate check.
Step 1: Choose Your BotSpot Plan
Compare the published BotSpot plans before purchasing. Core software is paid upfront; plan limits and checkout details are shown in the current purchase flow. Historical signup screenshots have been omitted because their offers no longer describe the product.
Step 2: Generate Trading Strategy Using AI Bot Builder
Now, you have to generate the strategy using AI Bot Builder with your desired prompt. To create a strategy, simply enter your prompt into the Describe Your Strategy Idea Here field and click on the Generate Strategy button. For instance, we have entered the prompt: "I want a bot that trades TQQQ using RSI. If RSI < 30 then buy, if RSI > 70 then sell."
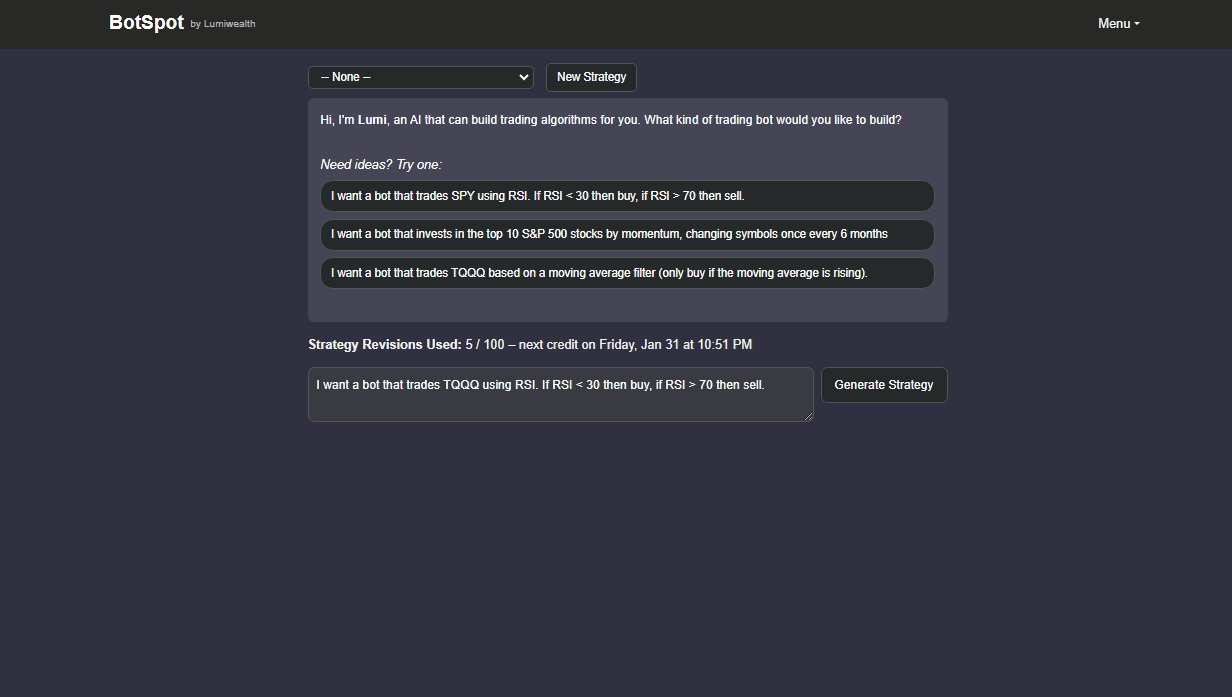
Once the strategy is generated, you will see a detailed output containing the required code for your trading bot. Check that the generated Python follows your specification, including evaluation timing, position sizing and exits. Generated code is a draft; it is not proof that the rules are safe or correctly implemented.
Step 3: Sign In or Register with Replit
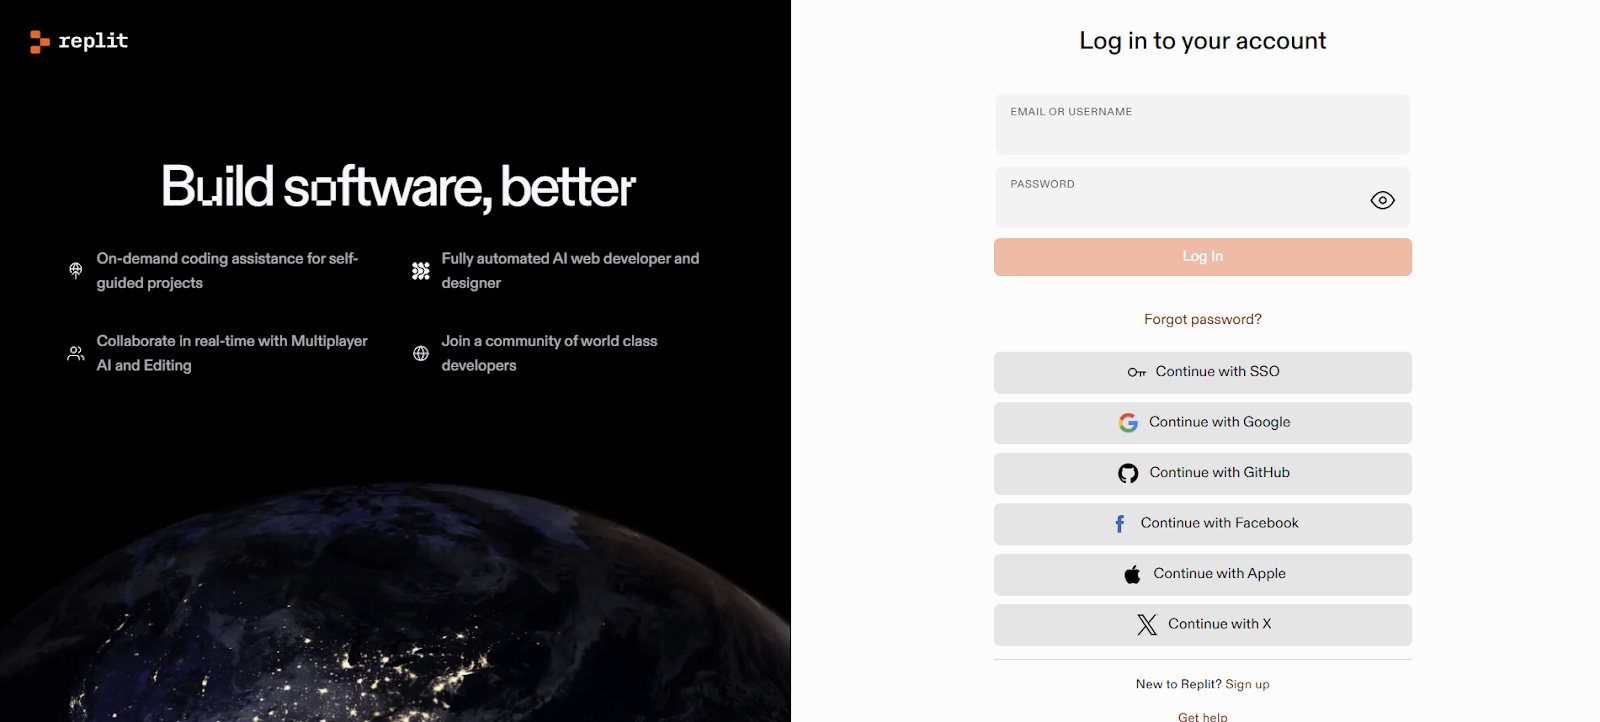
To deploy your strategy, you'll need to log in to or create a Replit account by visiting this link: replit.com. Replit will serve as the platform for running your trading bot, so this step is essential for smooth integration.
Note: Alternatively, you can use VS Code to run your strategy. Since Replit is a cloud-based platform, you can run your strategy directly without needing to install or configure anything on your computer, while VS Code requires additional steps like installing dependencies and configuring your environment.
Step 4: Set Up a New Project on Replit and Paste Your Code
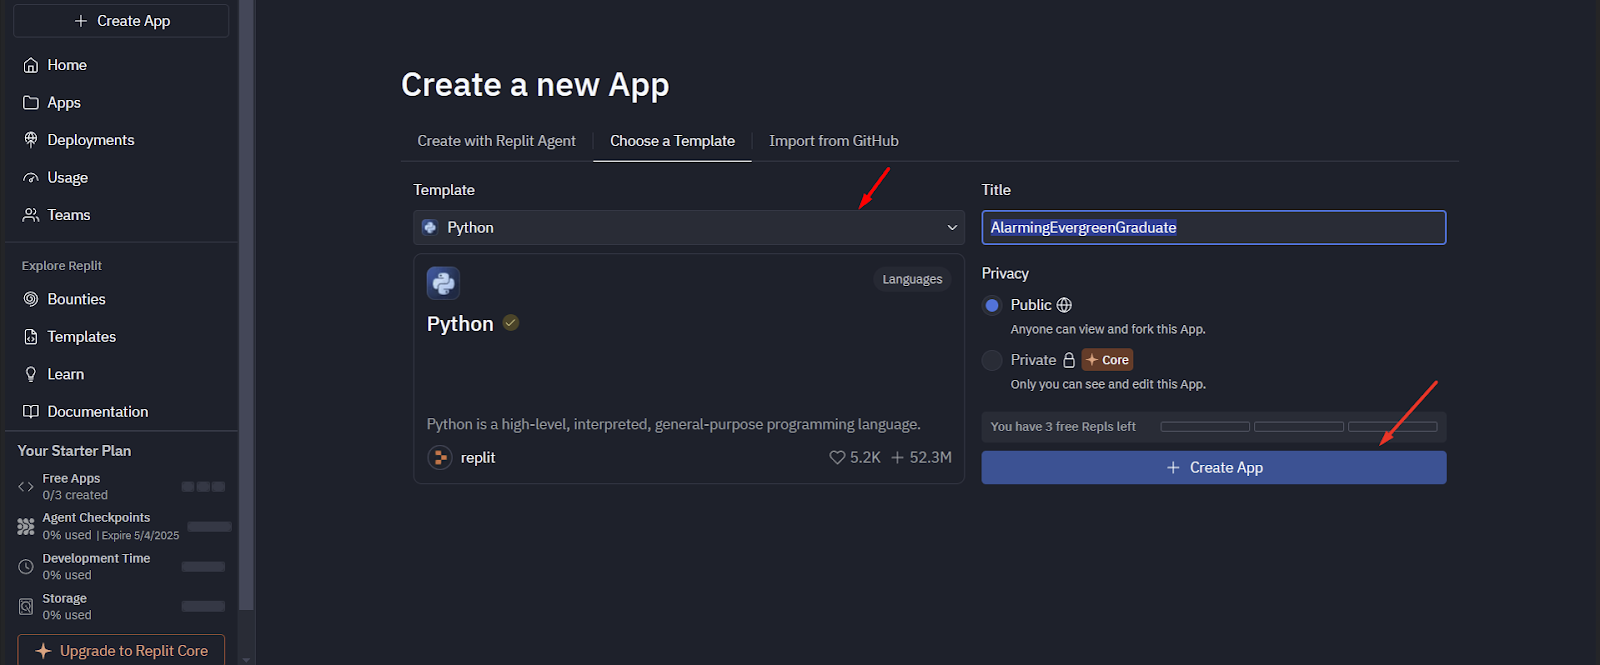
After signing into Replit, select "Python" from the template section, give your project a title, and click on the "Create an App" button to set up a new project. This will allow you to generate and deploy your trading bot using the strategy you created on BotSpot.
Note: You can also choose your preferred privacy mode, allowing you to control who has access to your project.
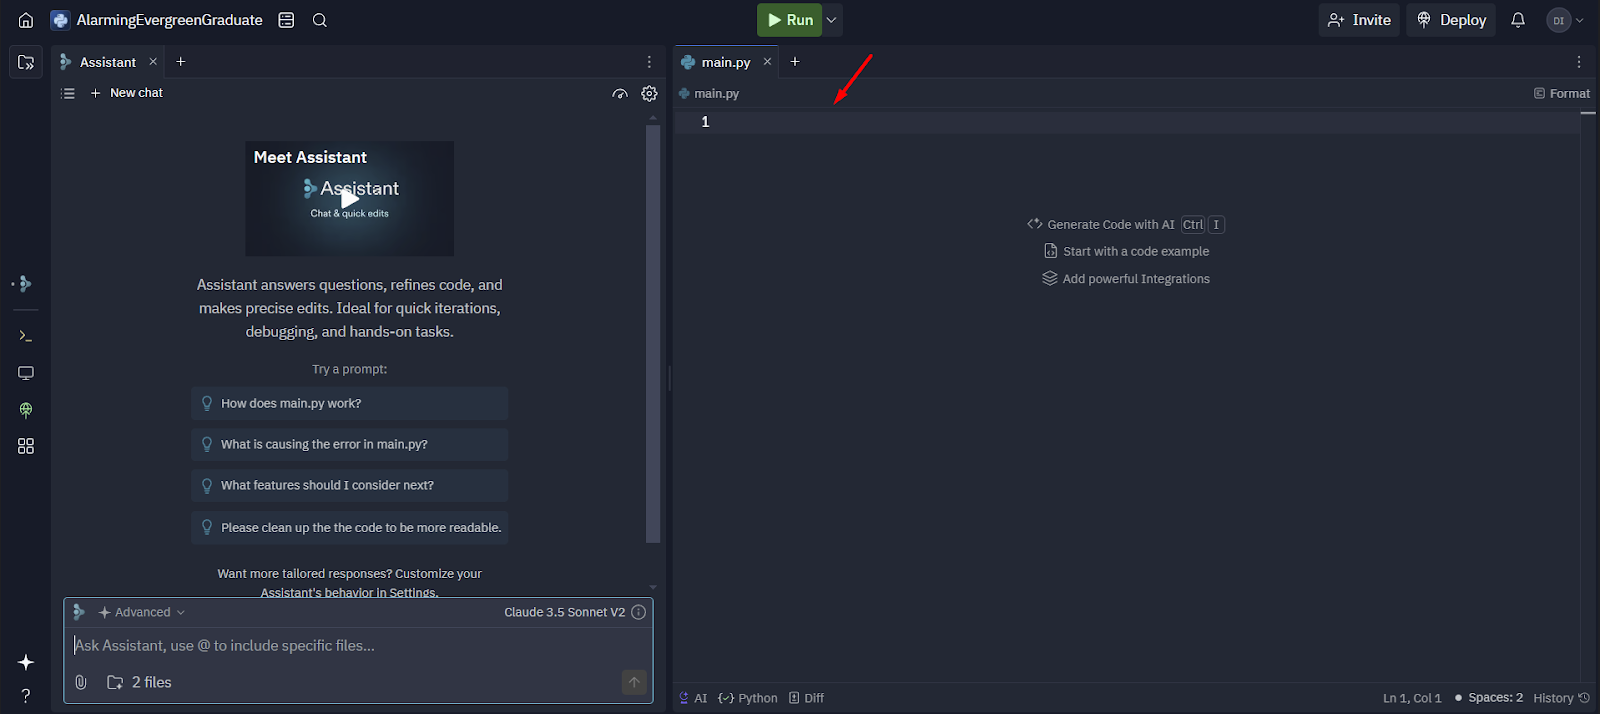
Once your app is created, copy the generated Python code from BotSpot and paste it into the Replit project under "main.py".
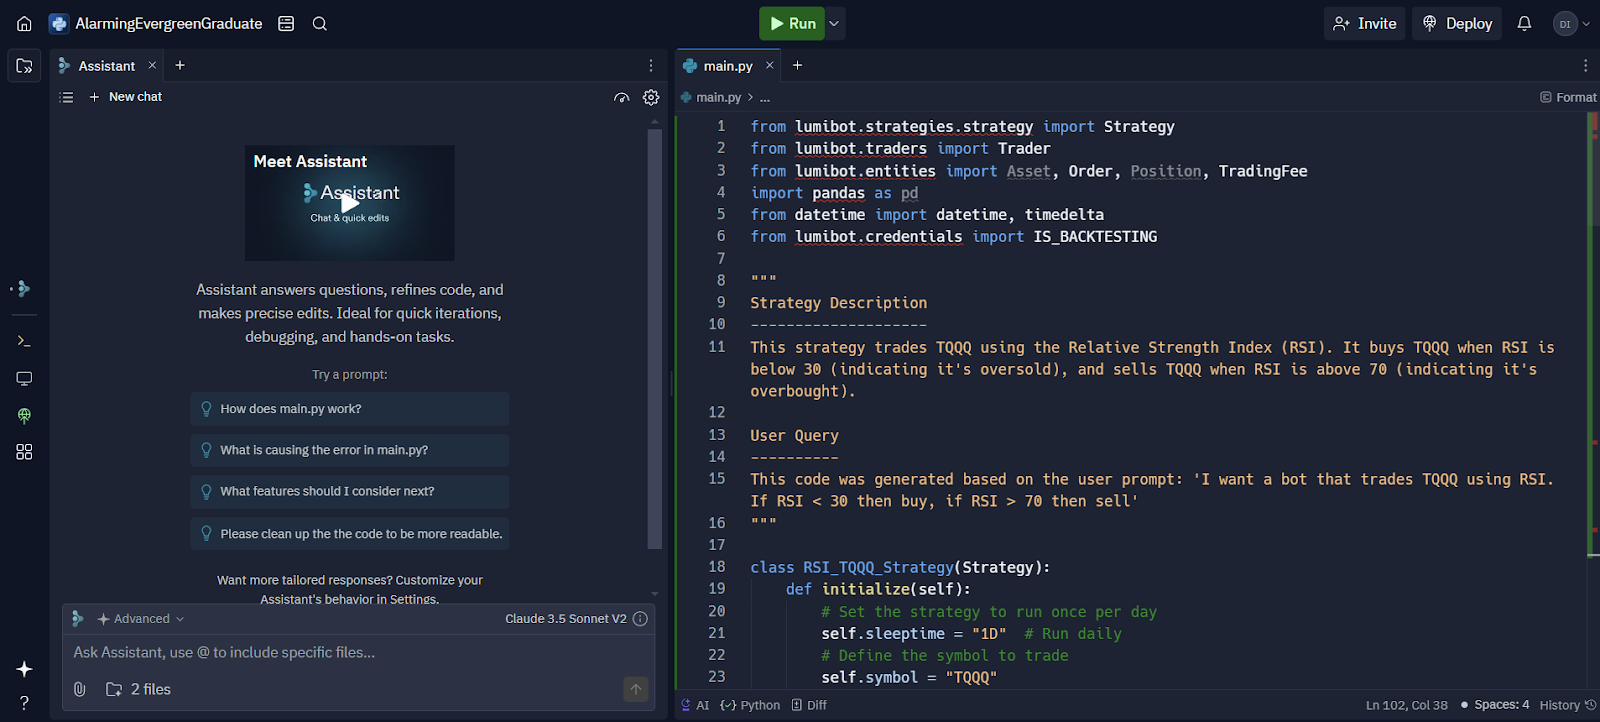
This is an example of how your Replit project will look once you have copied and pasted your code from BotSpot.
Step 5: Run Backtesting
To backtest your strategy in Replit, click on "All Tools" on the left sidebar and select "Secrets" to configure your environment.
Note: If you prefer to backtest in VS Code, you'll need to create a .env file.
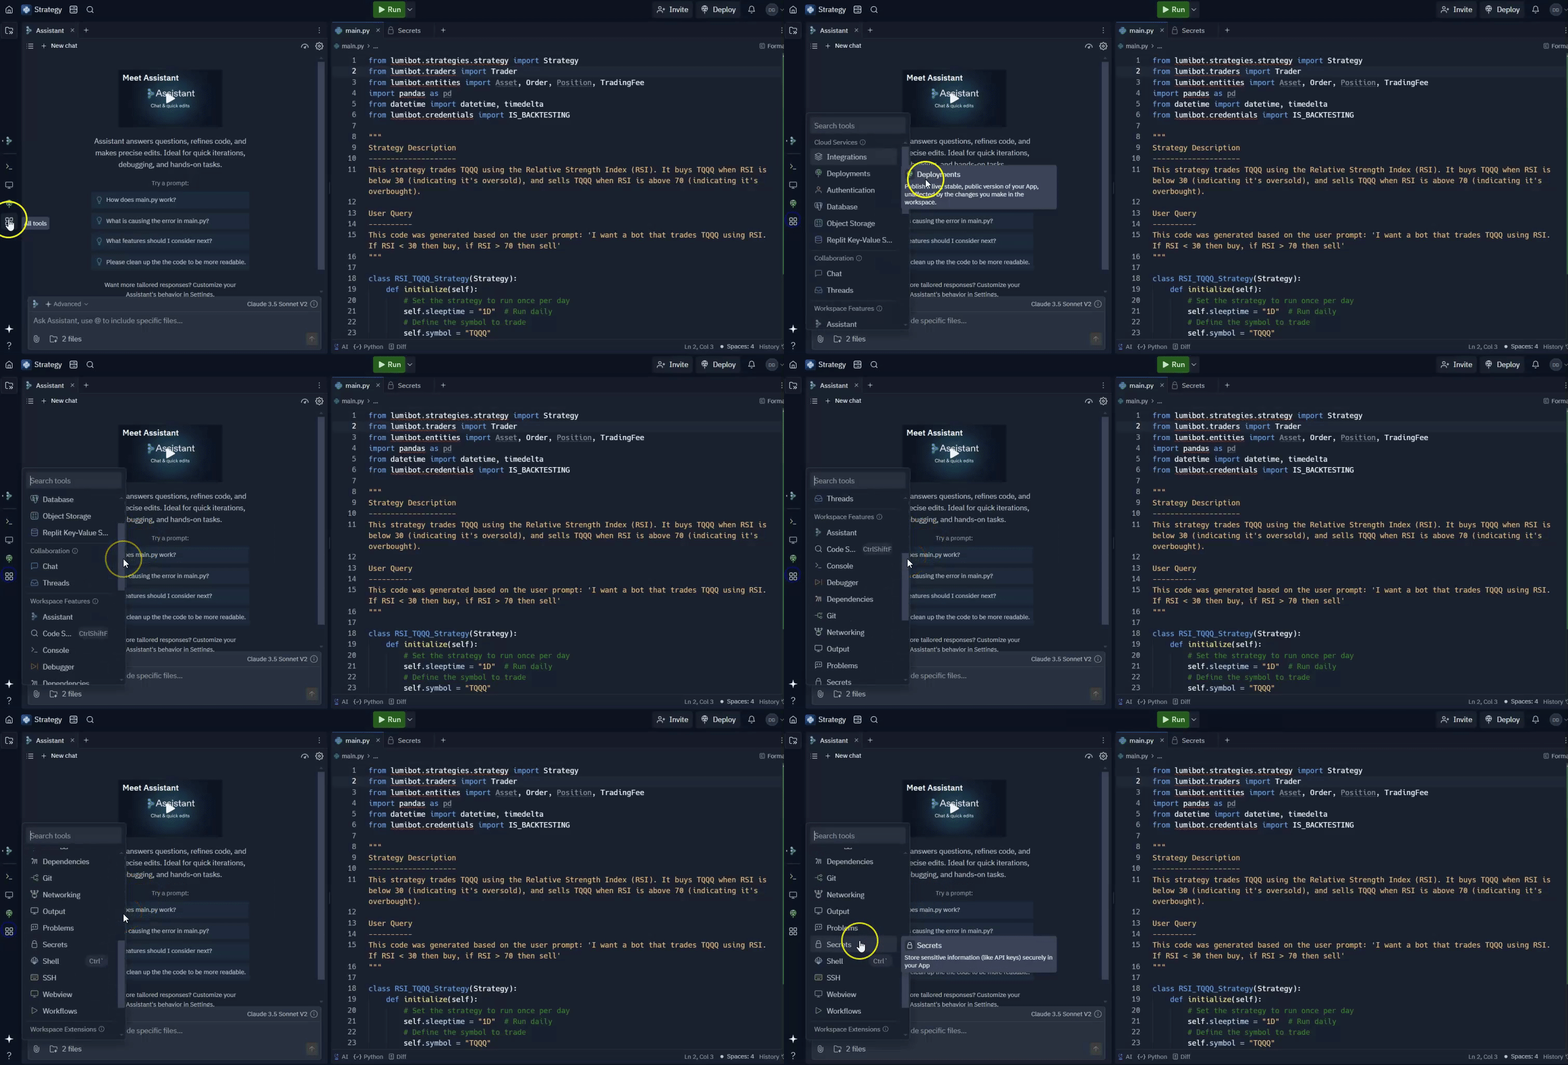
To initiate the backtesting, enter the required secrets, set IS_BACKTESTING to TRUE in the respective Key and Value spaces, and click on the "Run" button on the top.
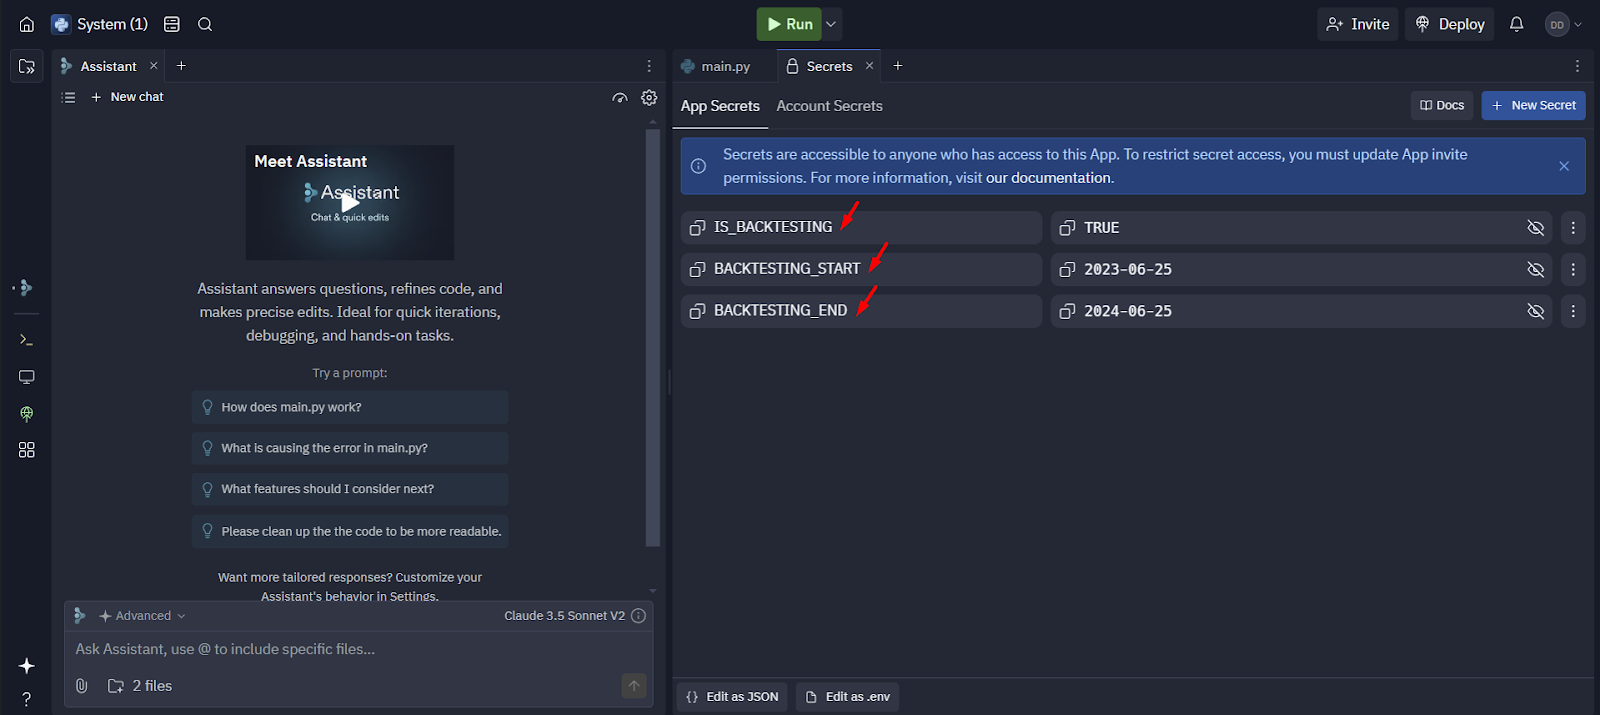
Note: You can also define the start and end dates if you like to fetch the results for custom data by adding a "New Secret." The Key should be BACKTESTING_START and BACKTESTING_END with the format of the Value being YYYY-MM-DD.
Step 6: View Backtesting Output
In order to view your backtesting output, go to "All Files" in the top left corner and look for files ending in tearsheet.html and trade.html. Click on both to download your backtesting output and view them. If these files don't appear right away, try refreshing the page.
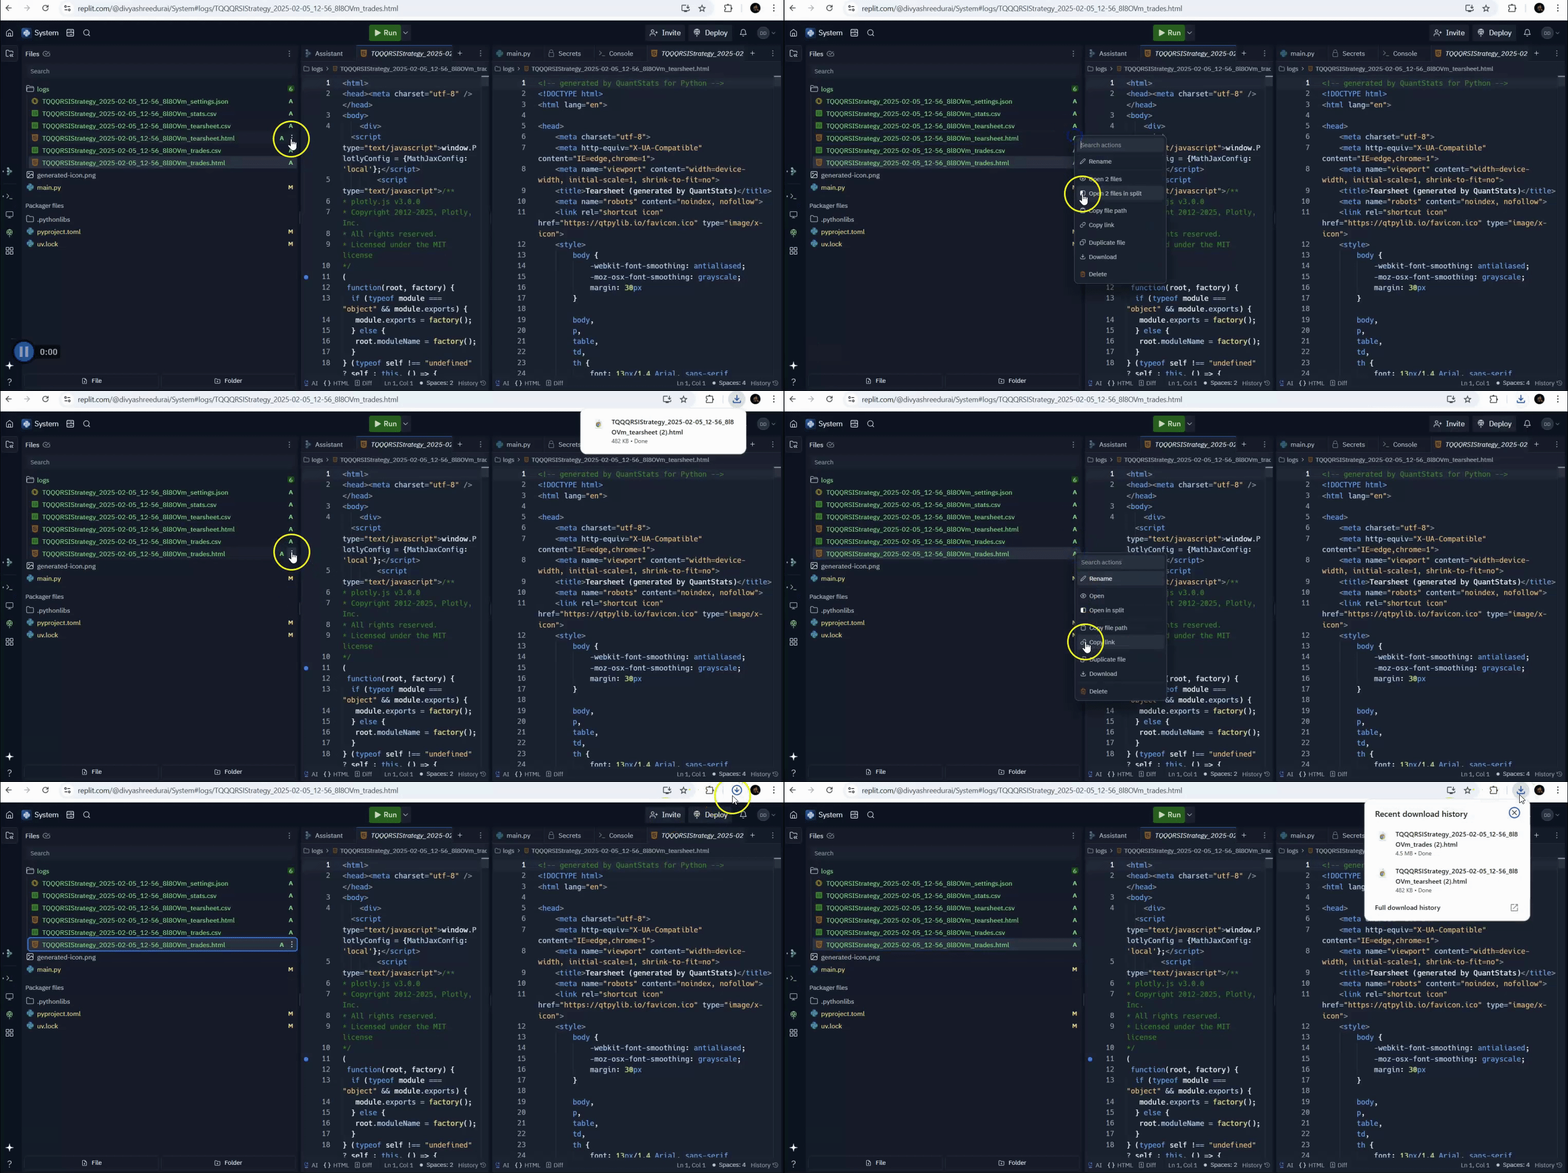
Here's the backtesting output:
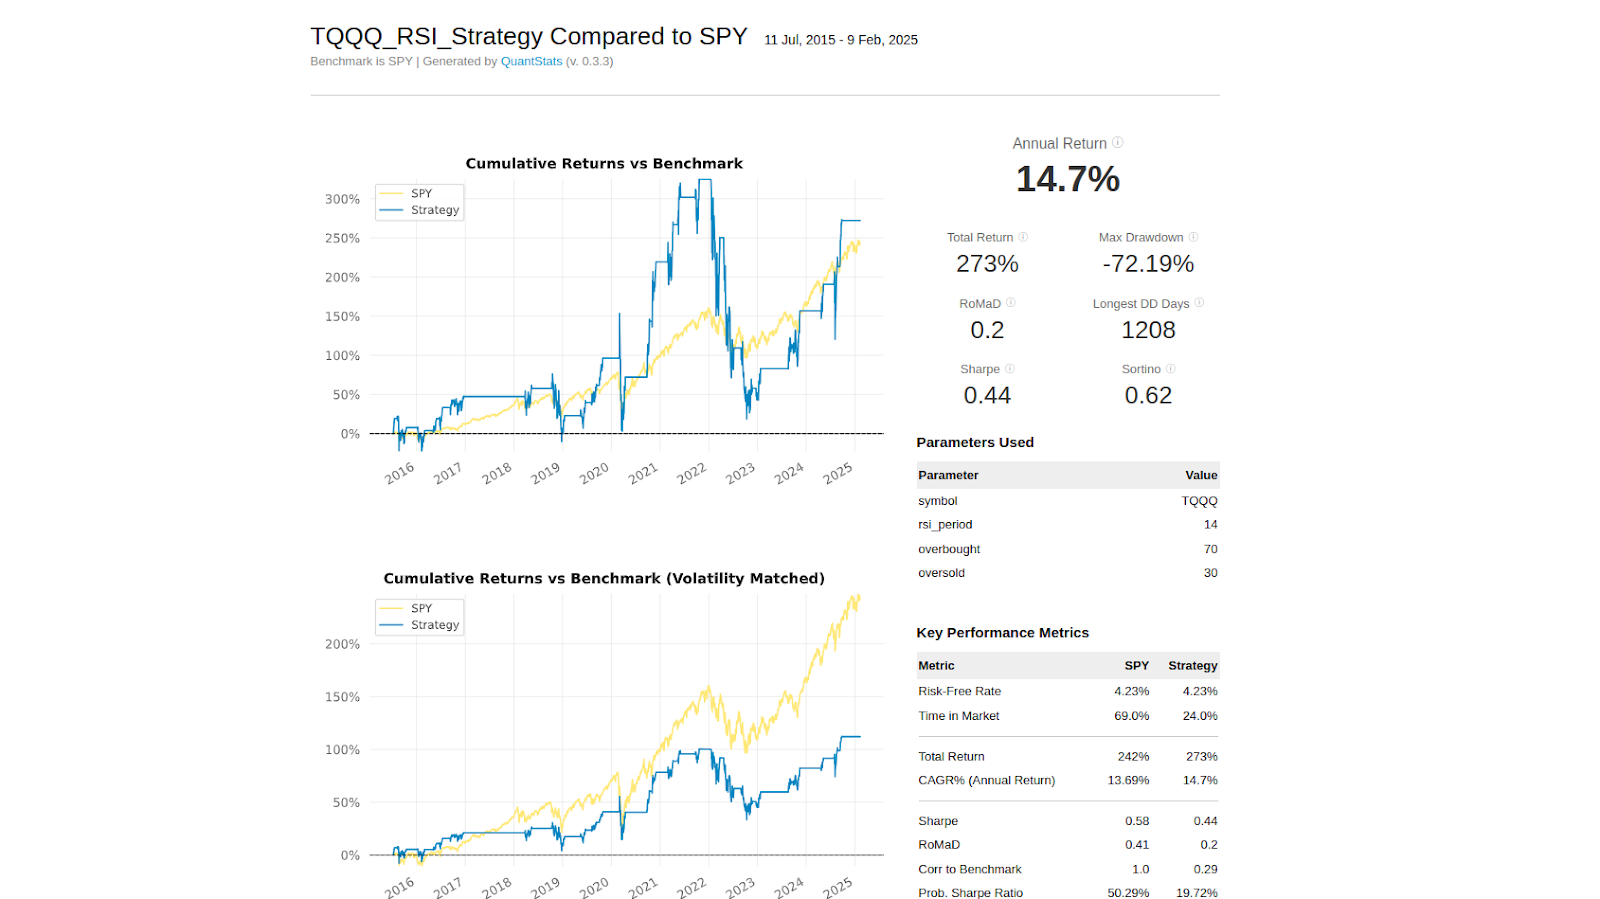
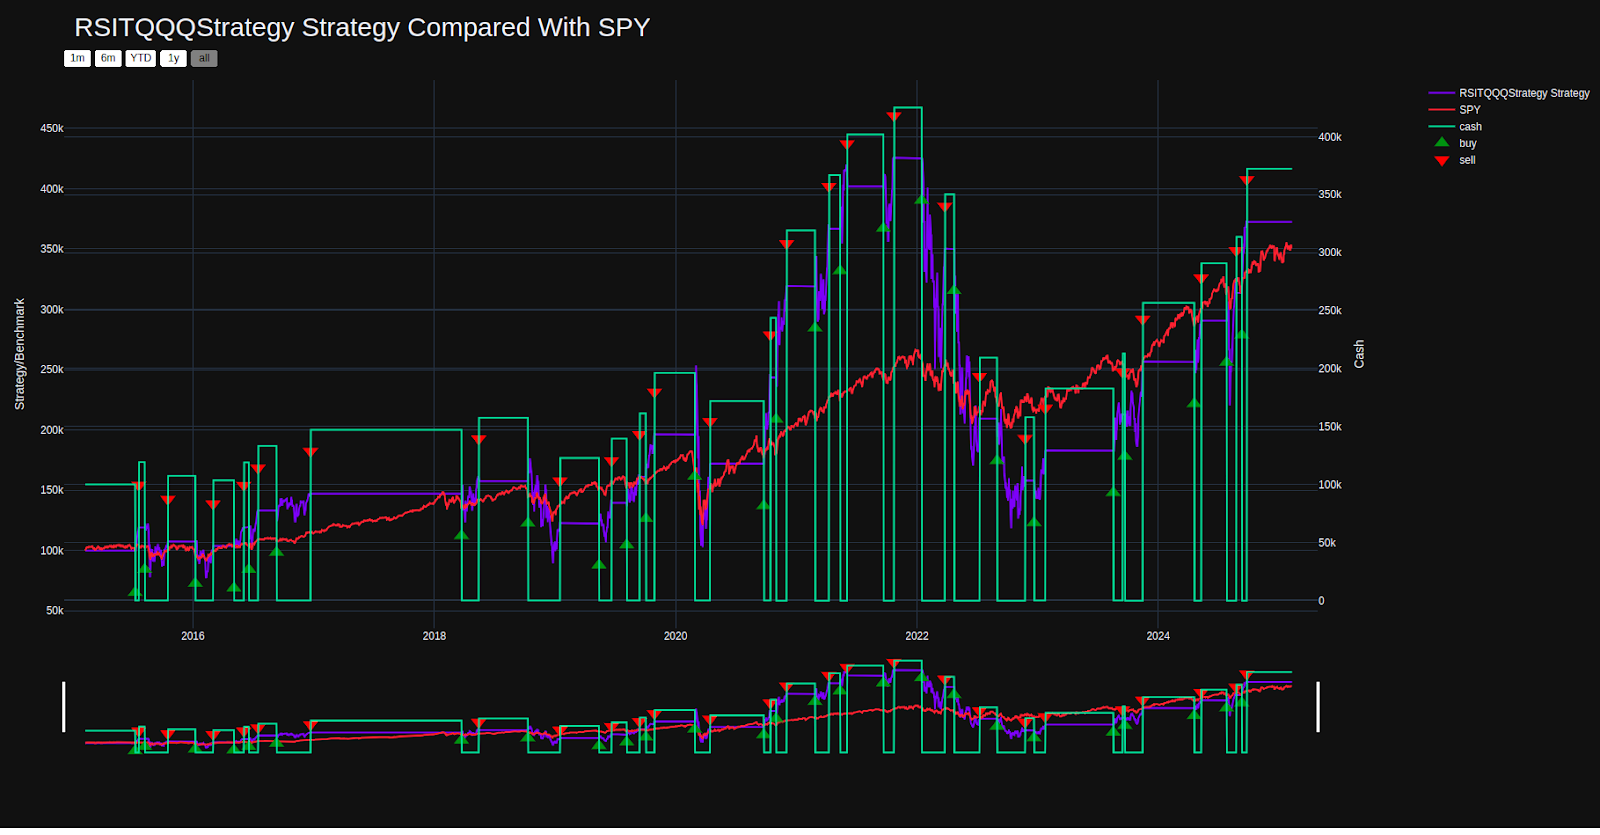
Now, if the strategy is not to your liking, Botspot also allows you to refine it by adjusting parameters, modifying indicators, or tweaking entry and exit conditions, and you can improve your strategy's performance.
Step 7: Refine Strategy Using AI Bot Builder
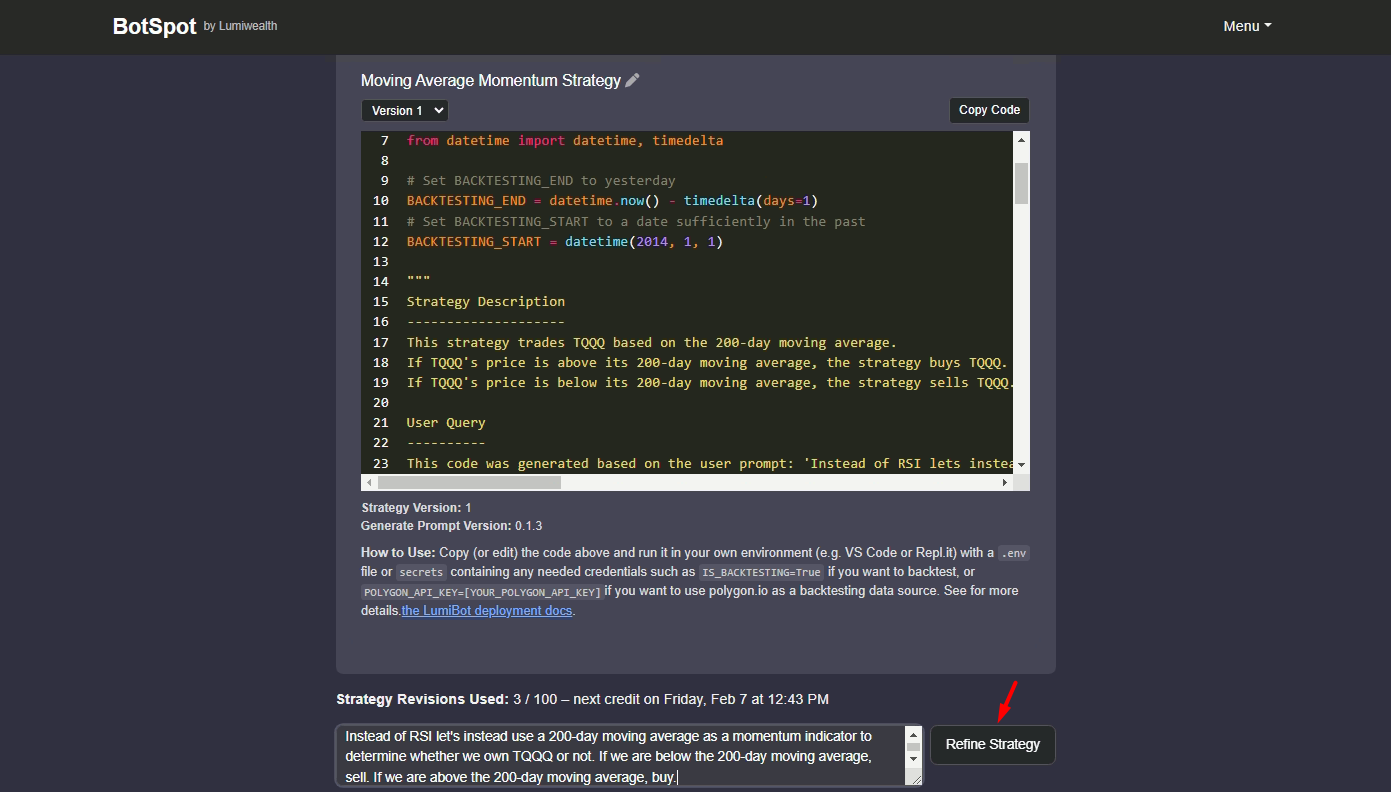
To refine your strategy, head to the AI Bot Builder and enter a new prompt in the "Refine Strategy" block.
For instance, the original prompt that was used is: "I want a bot that trades TQQQ using RSI. If RSI < 30, then buy, if RSI > 70 then sell", and now we want to refine it to a moving average strategy where the prompt will be: "Instead of RSI let's instead use a 200-day moving average as a momentum indicator to determine whether we own TQQQ or not. If we are below the 200-day moving average, sell. If we are above the 200-day moving average, buy." Next, click on "Generate Strategy" to refine your strategy.
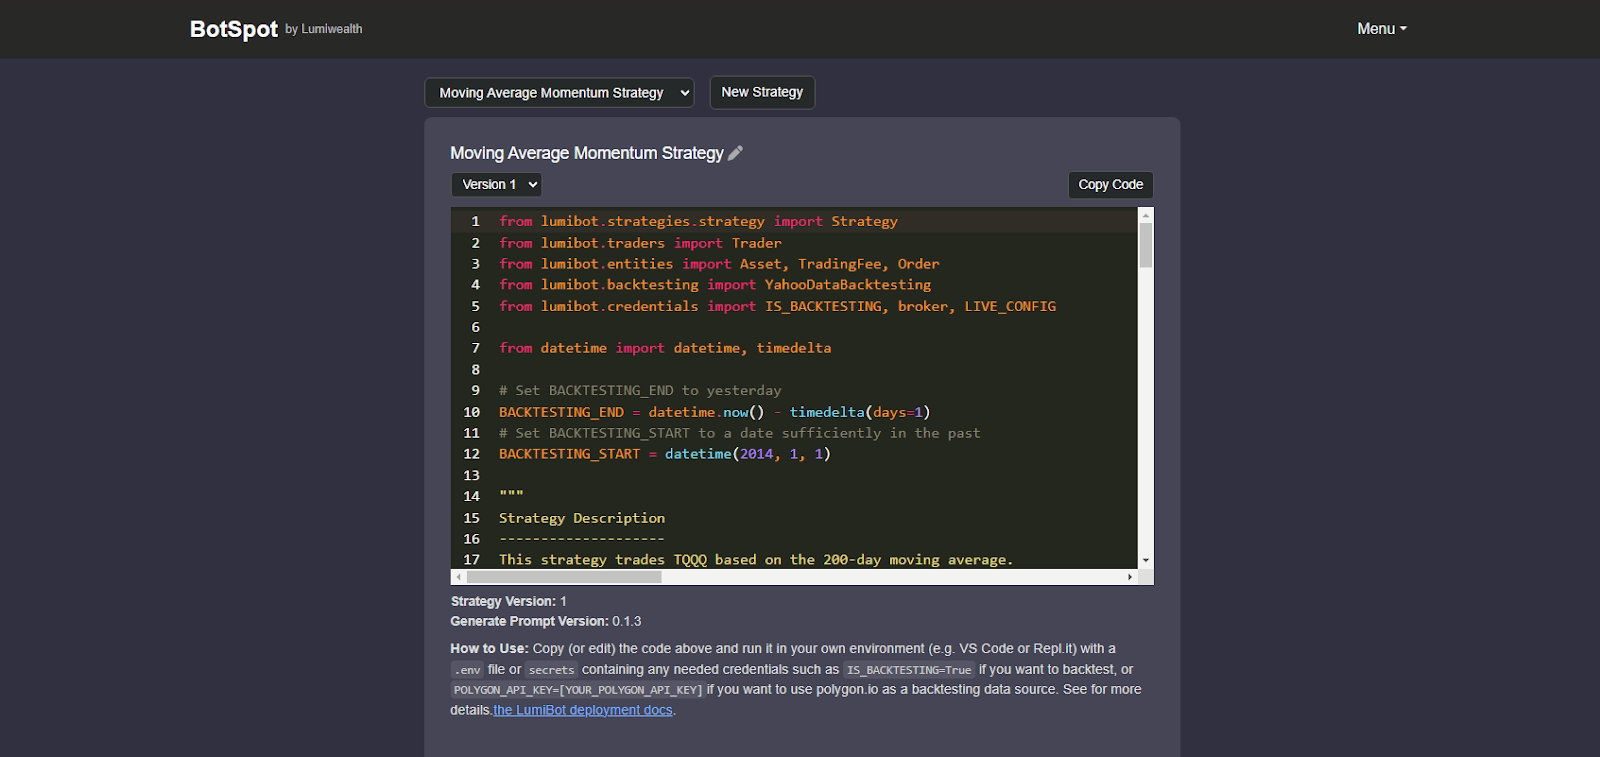
Step 8: Copy the Code to Replit
Replace your existing code with your refined strategy in the "main.py" file.
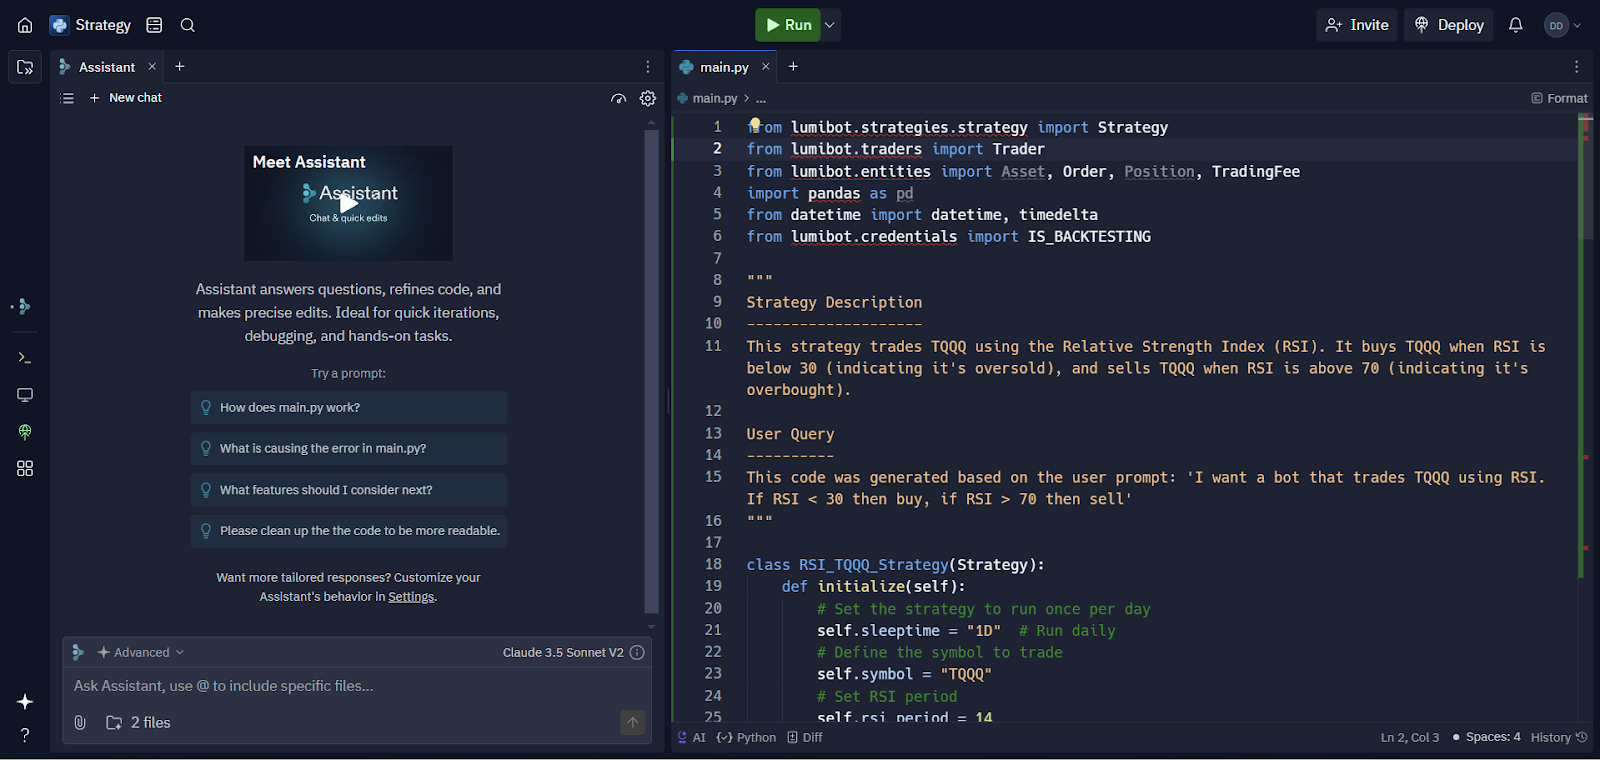
Step 9: Run Backtesting to Generate Output
To run the backtesting, input the necessary secrets in the "Secrets" option under "All Tools" like done in the earlier steps, set IS_BACKTESTING to TRUE, and specify the start and end dates in the format YYYY-MM-DD if you would like to. Click on the "Run" button on the top and generate the output.
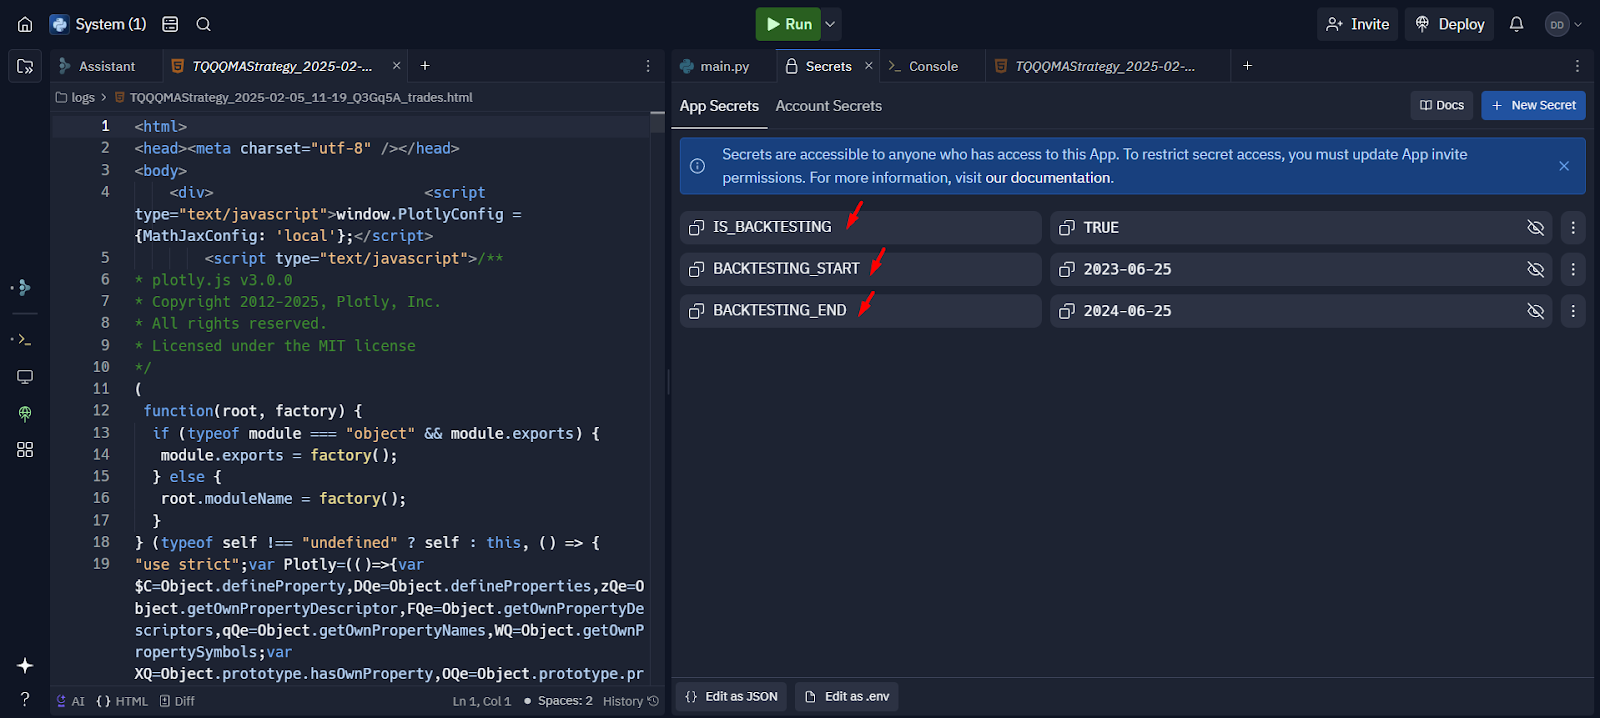
Backtesting Output:
These historical screenshots show simulated output after a revision. This article does not provide a reproducible run configuration or a complete trade export for independent validation. Do not infer a live track record from the images or choose a strategy from the displayed return alone.
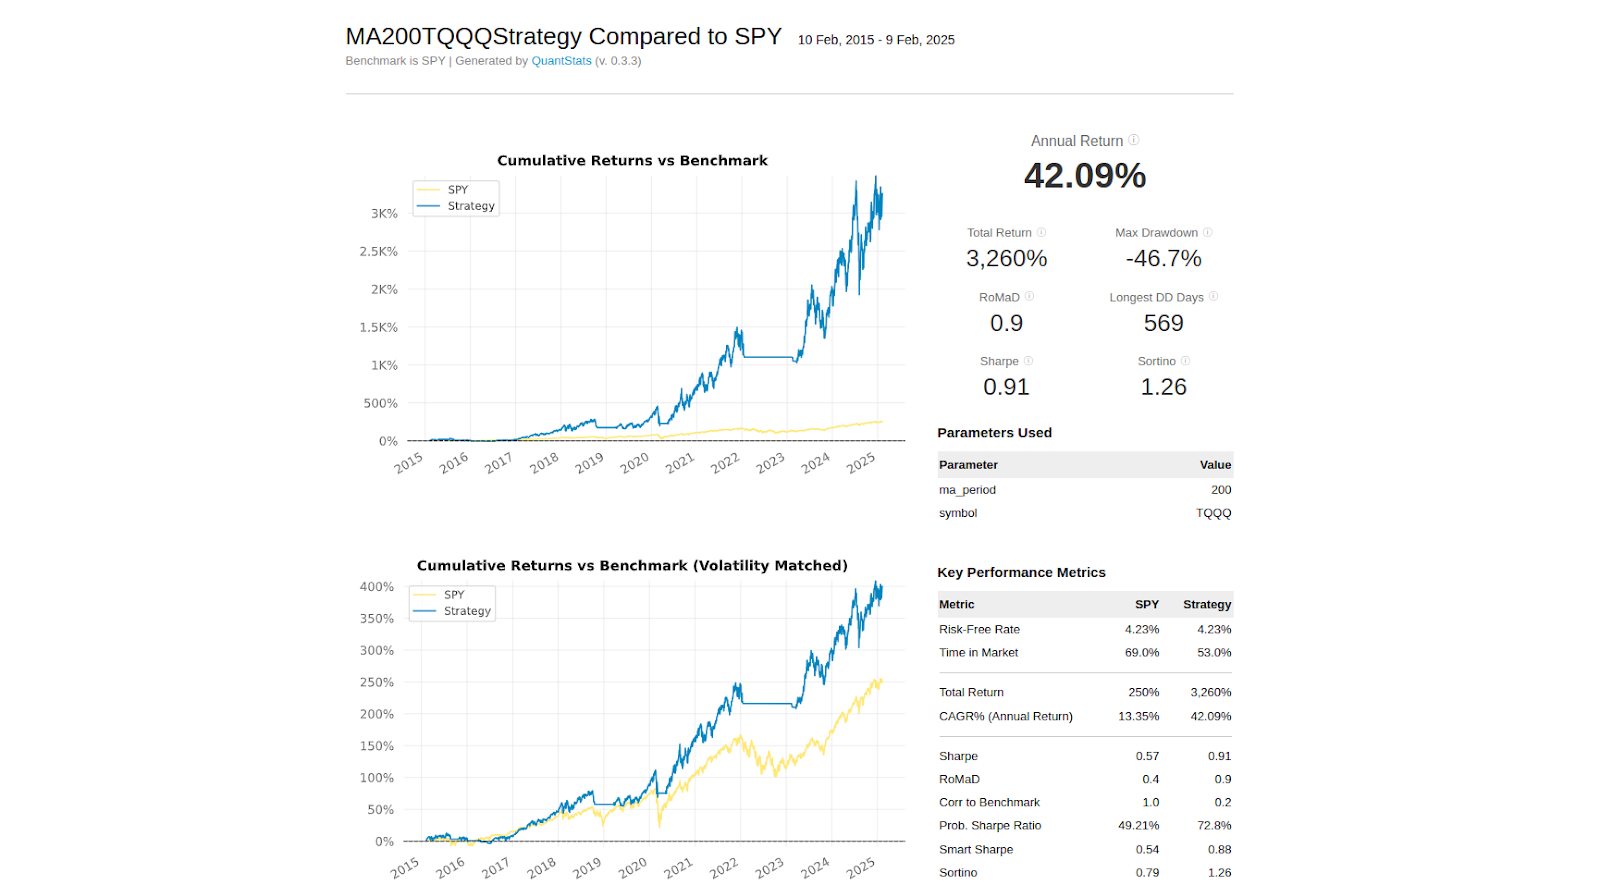
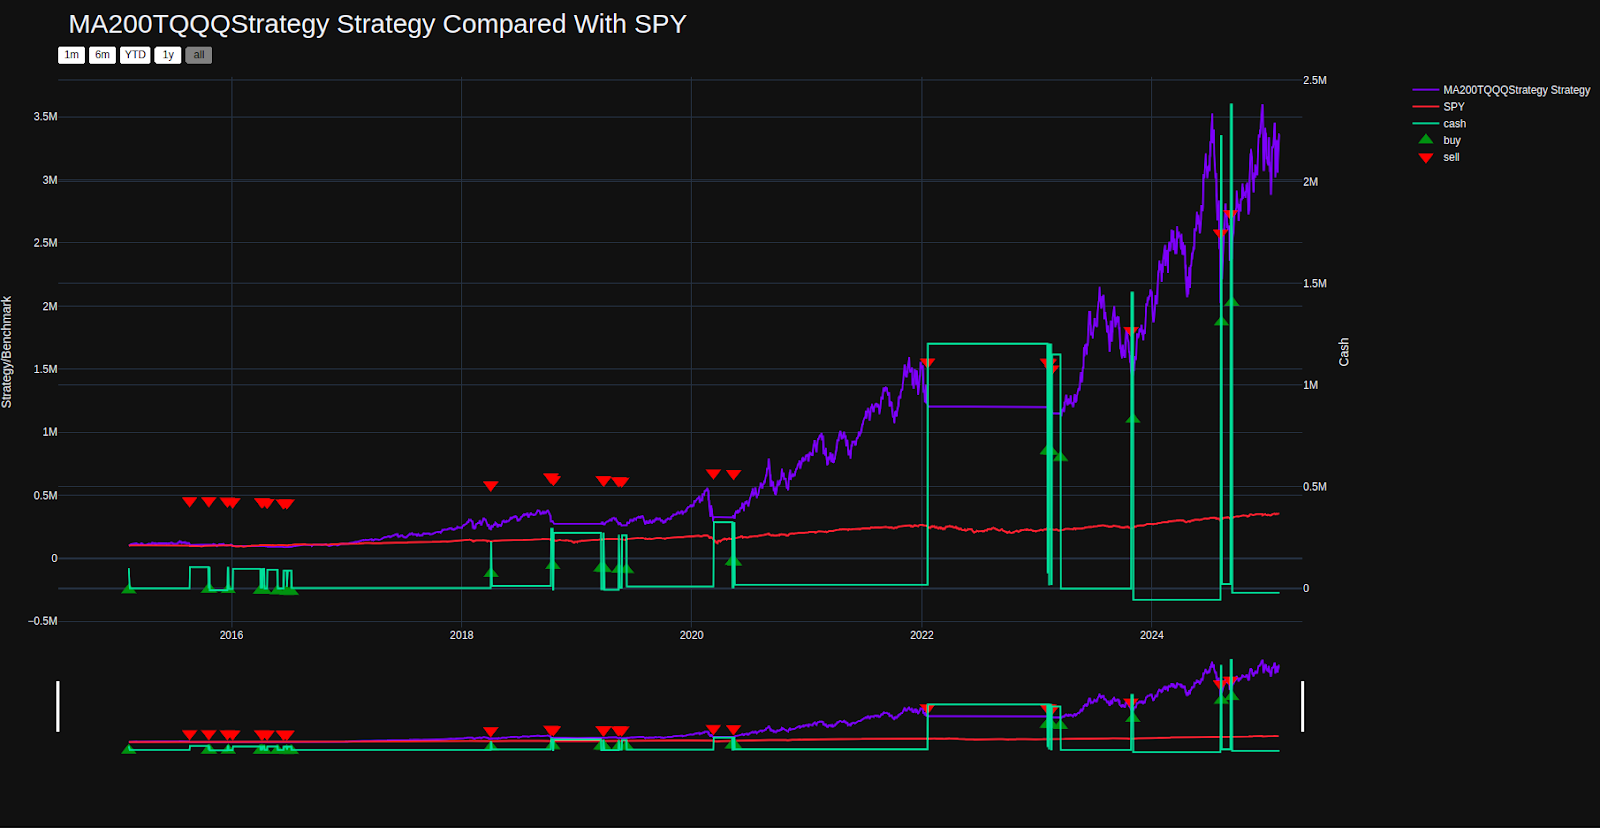
Before a live decision, inspect unseen-period results, data timing, fees, slippage and failures. Broker permissions and order handling need their own operational checks. The paper and live trading guide explains what each stage can demonstrate.
Deploying Your Strategy Live in Alpaca
Step 1: Set Up Your Alpaca Account
To run the strategy live with Alpaca, first visit this link: https://alpaca.markets/ and open an Alpaca account to access their trading API. You can easily sign up for free with Alpaca.
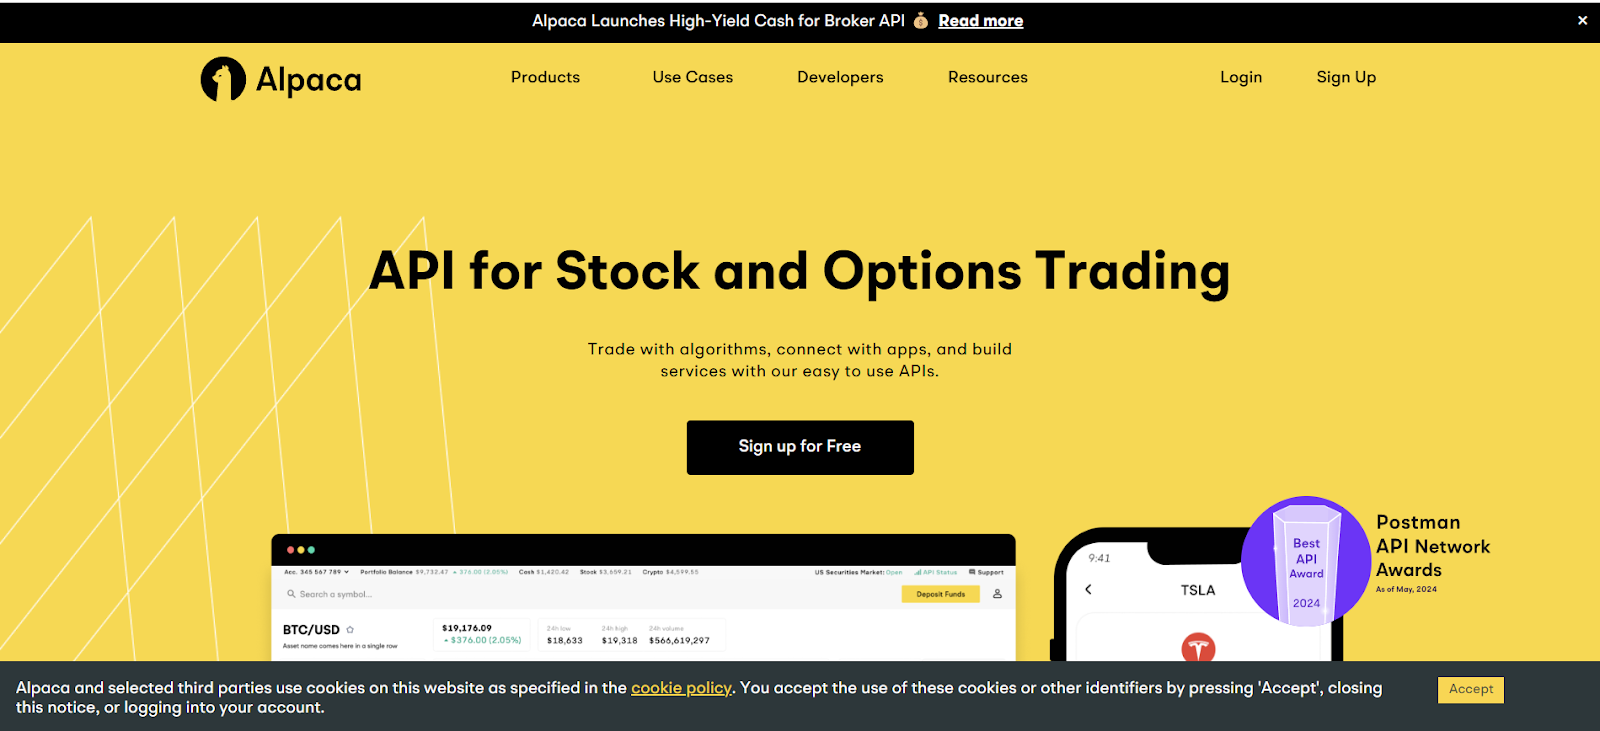
Once you click on the "Sign up for Free" button, you will be redirected to a page where you need to fill in some basic details like your name, country, and email address and set a password for your account.
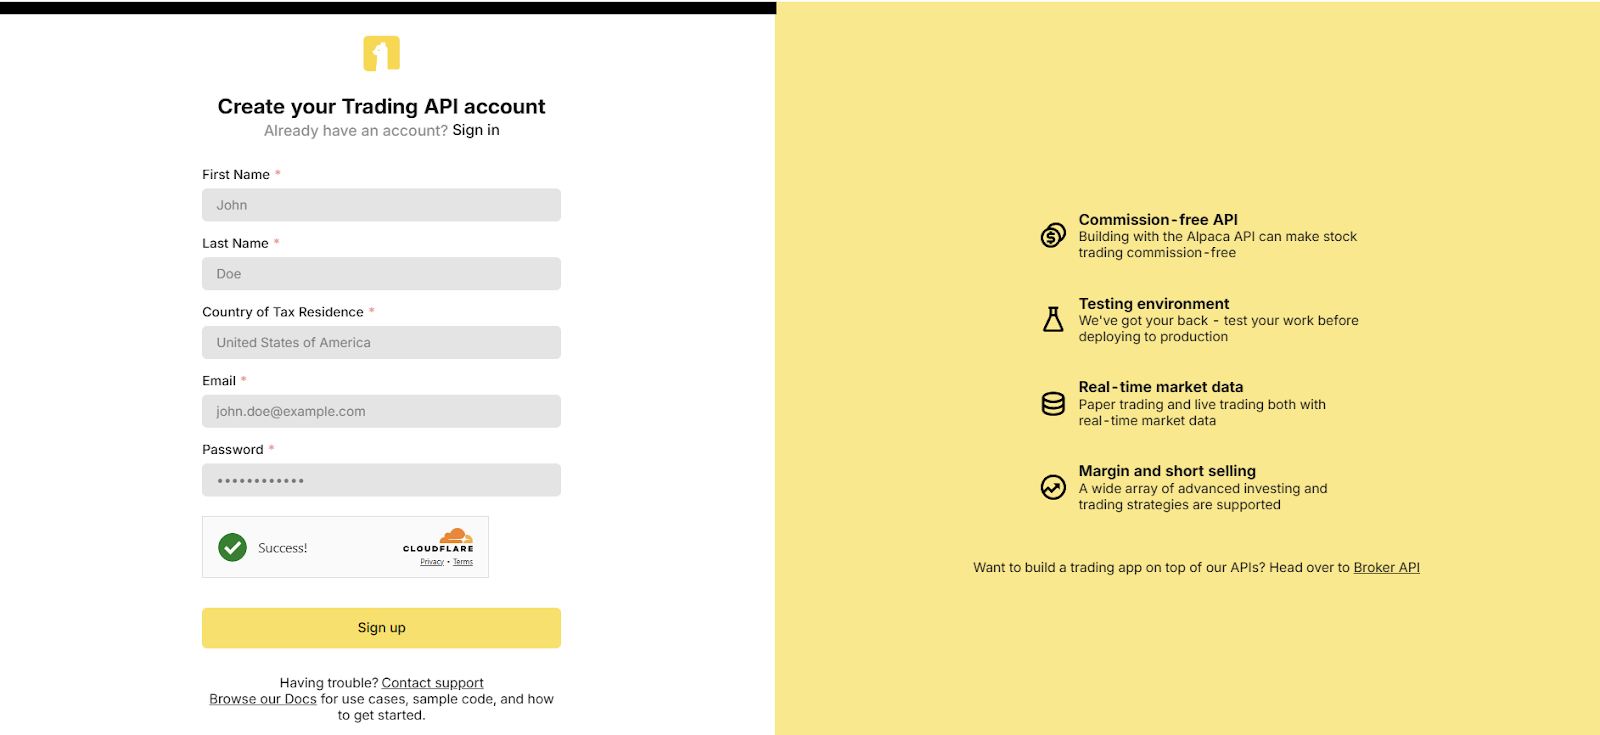
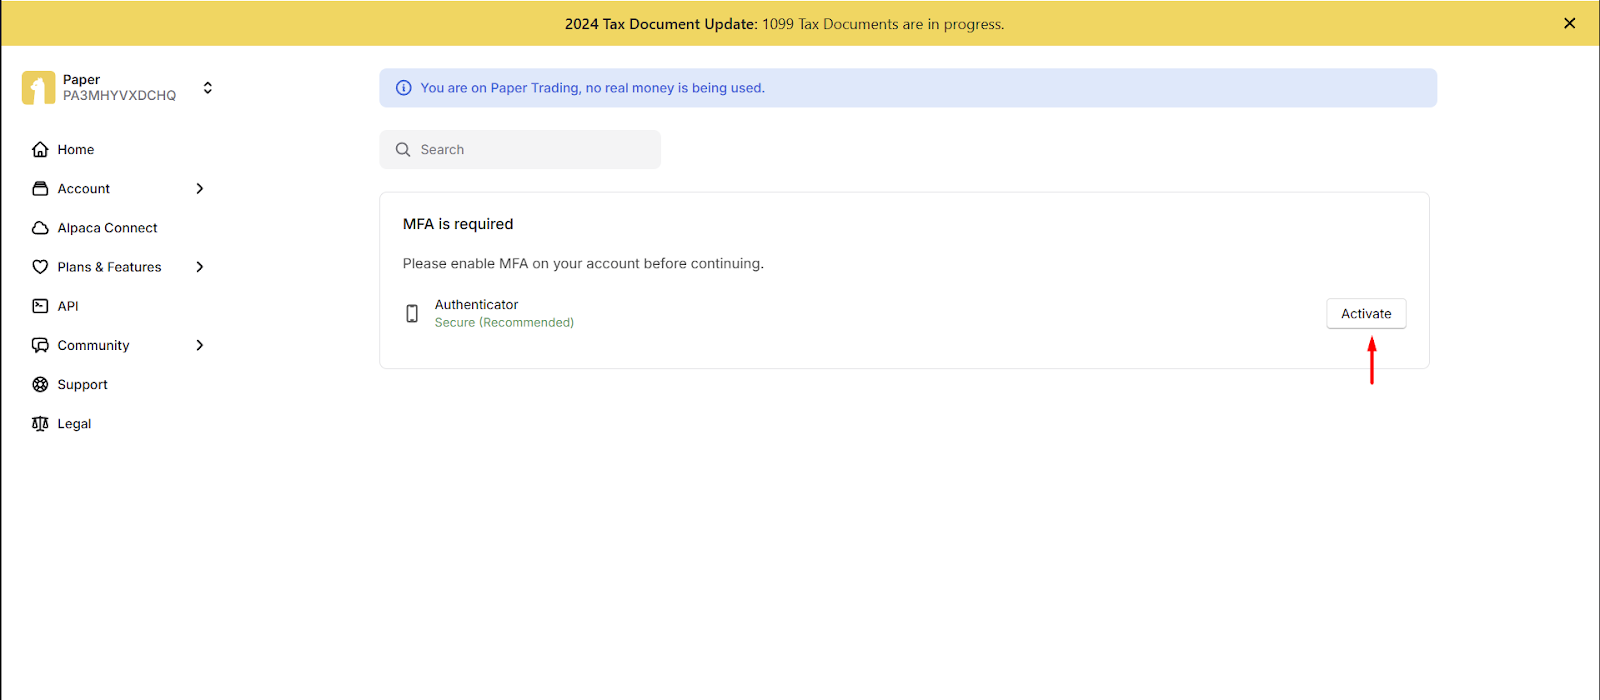
After you have set up your account, you need to log in using your credentials and go to the homepage of Alpaca where you will have to complete MFA authentication using Microsoft Authenticator. Simply download the "Microsoft Authenticator" app on your mobile.
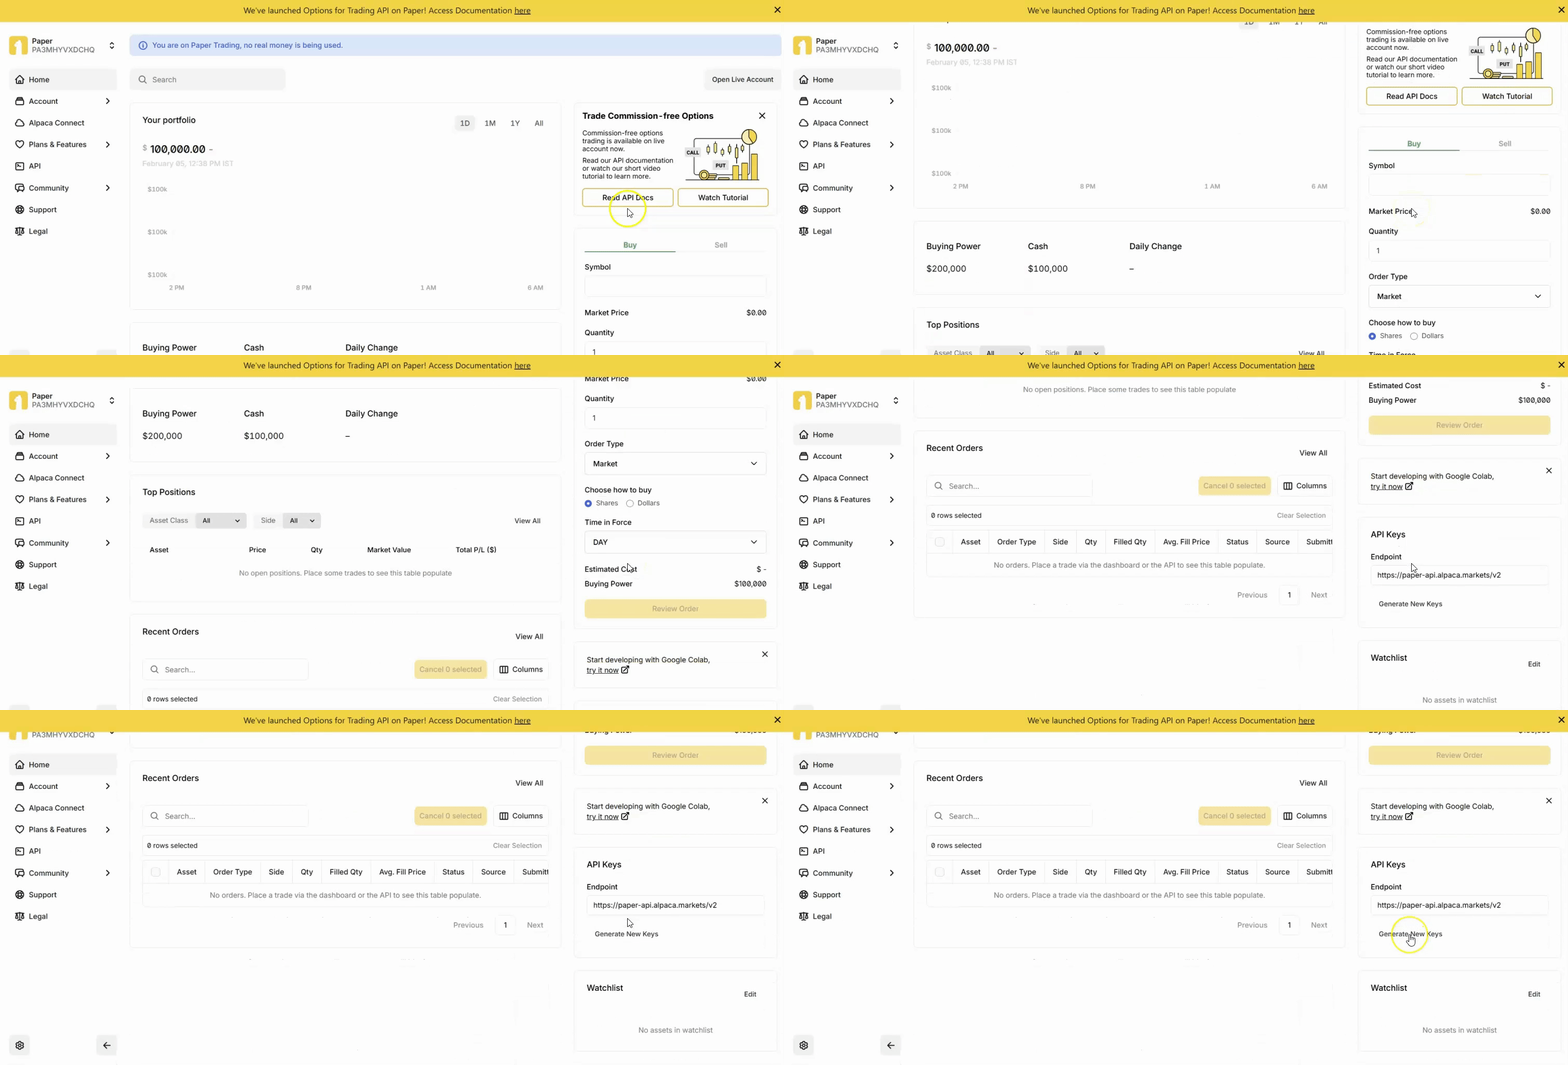
Go to "Home" and scroll down to navigate to the API settings, where you can find your API keys and API secret.
Step 2: Copy API Keys to Replit
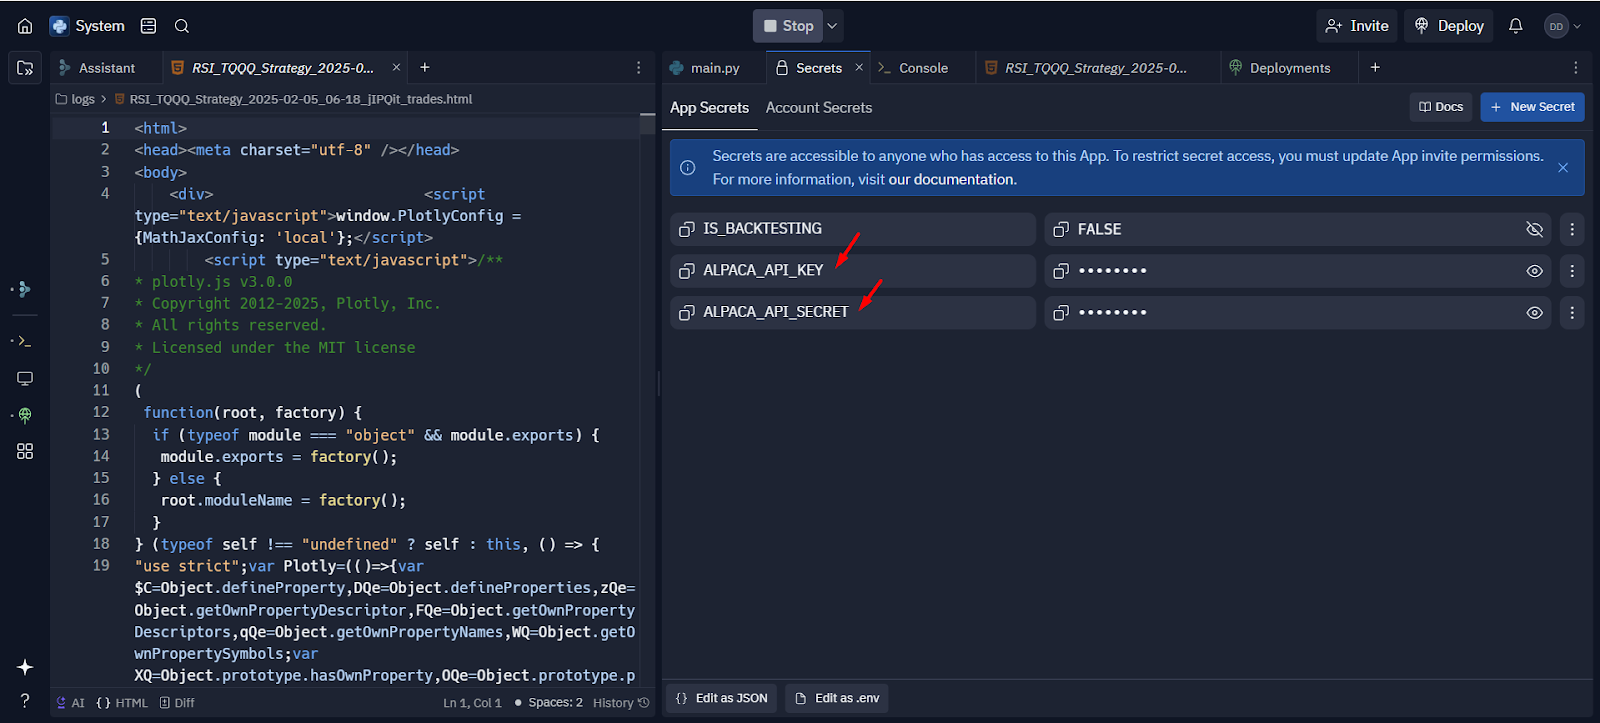
The historical external-runtime example stored Alpaca credentials in Replit Secrets. Setting IS_BACKTESTING to FALSE disables historical simulation; it does not, by itself, choose a paper or live brokerage account. Account mode and credentials must match the actual broker configuration. Current BotSpot users manage broker authentication in the protected connection flow rather than putting secrets in an AI prompt.
Step 3: Create a Trading Bot with BotSpot
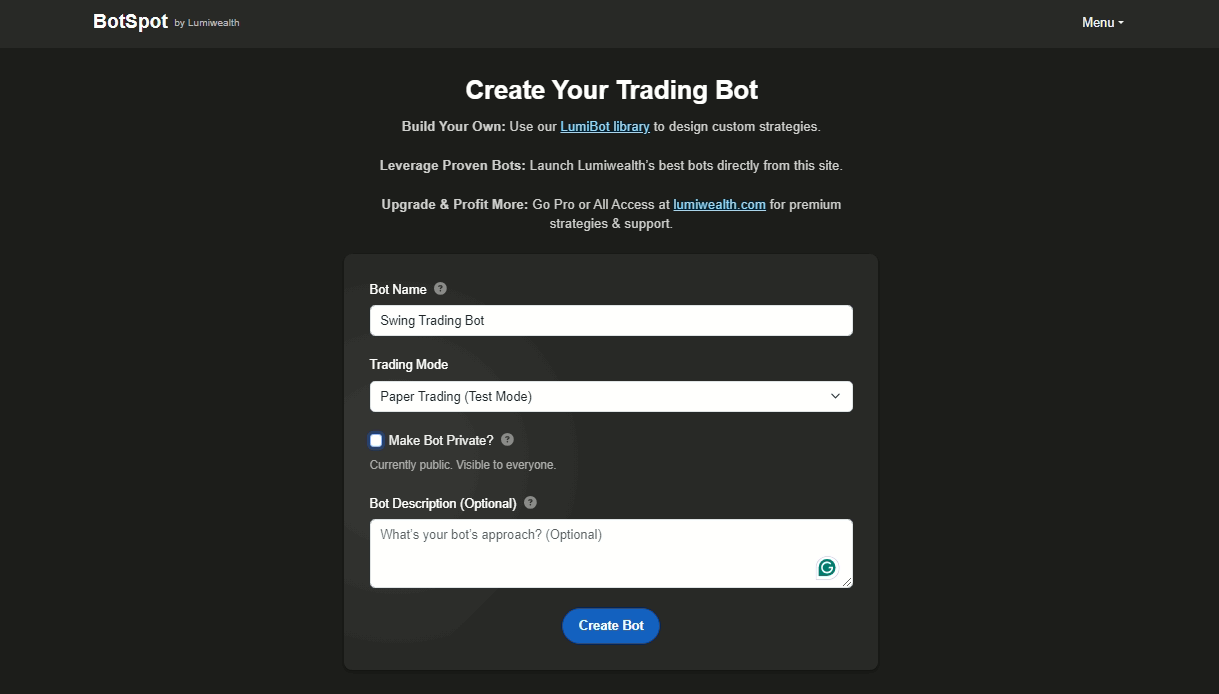
Next, you have to add a bot using your BotSpot account to get the API key for LumiWealth. Once you have logged in, go to the menu and click on the "Add Bot" button. You will be redirected to the "Create Your Trading Bot" page, where you have to give your bot a name, select your trading mode, choose your preferred privacy, and finally, click on the "Create Bot" button.
Note: You can also add a description for your bot in the "Bot Description" space if you would like.
Step 4: Run Your Strategy Live in Replit
Once your bot is created, copy the API key for LumiWealth into Replit under the variable LUMIWEALTH_API_KEY.
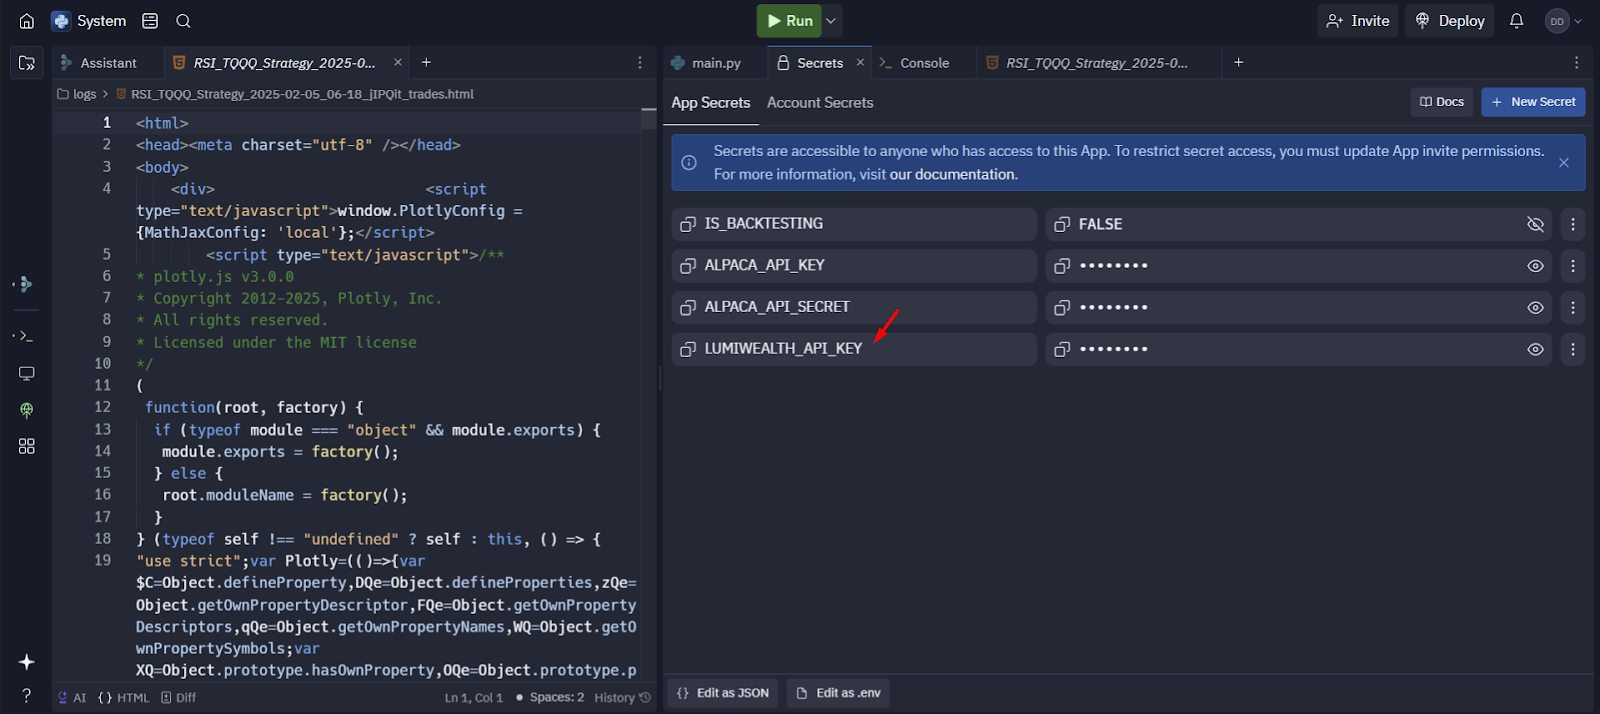
After setting everything up, click on the "Run" button at the top.
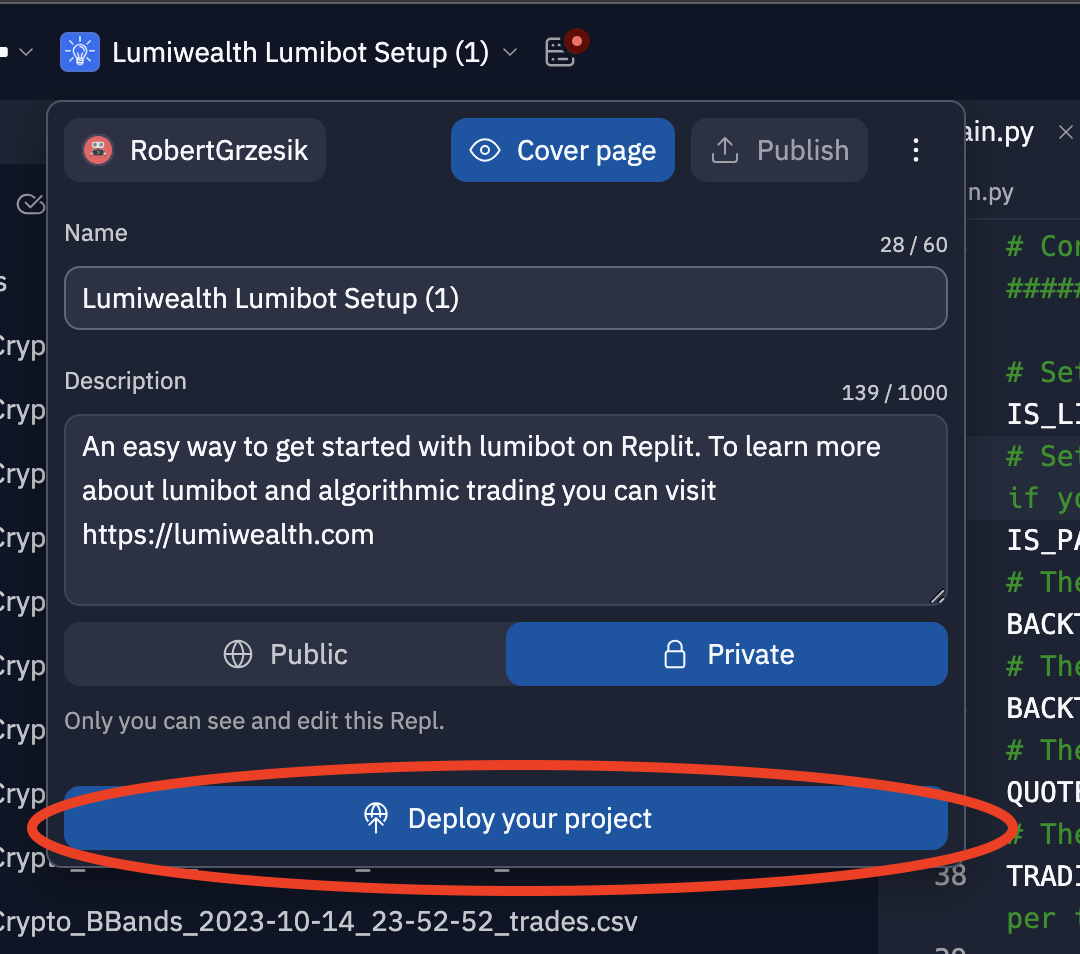
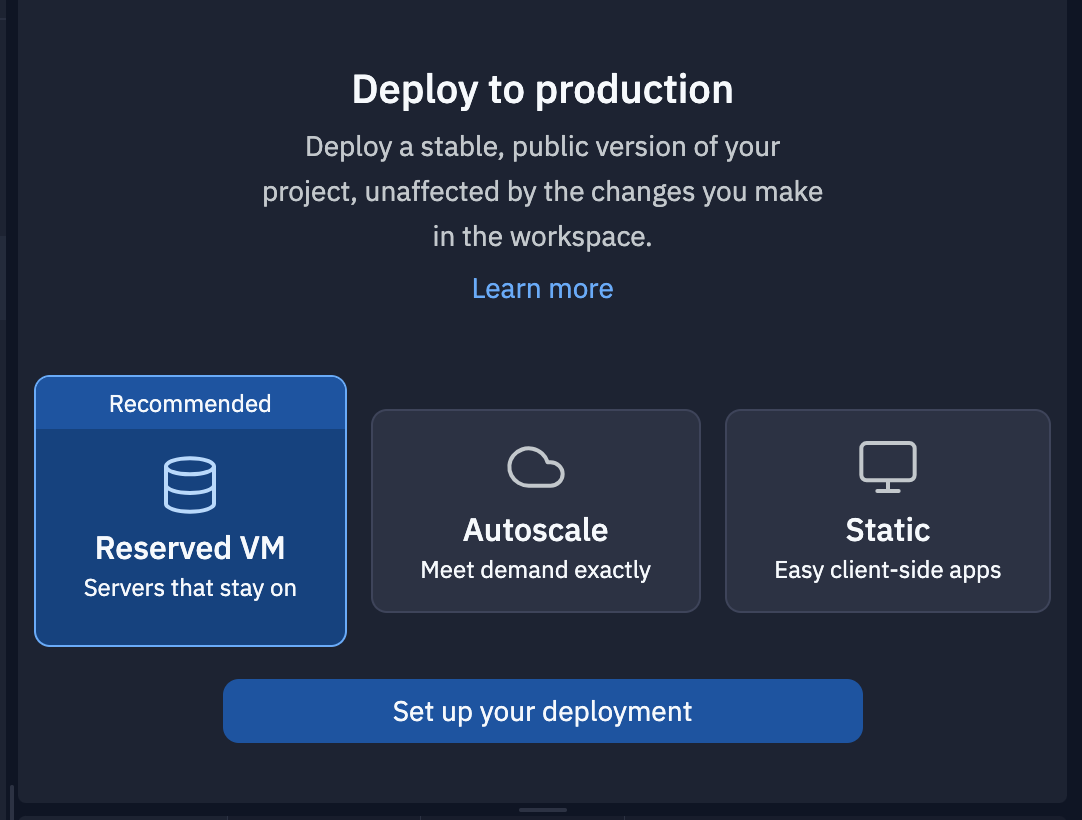
To deploy your project, start by clicking your project name in the top left, then select "Deploy your project." Choose "Reserved VM" and click "Set up your deployment." Next, select your CPU and memory configuration (typically, 0.25 vCPU and 1GB RAM is sufficient) and proceed to purchase and deploy.
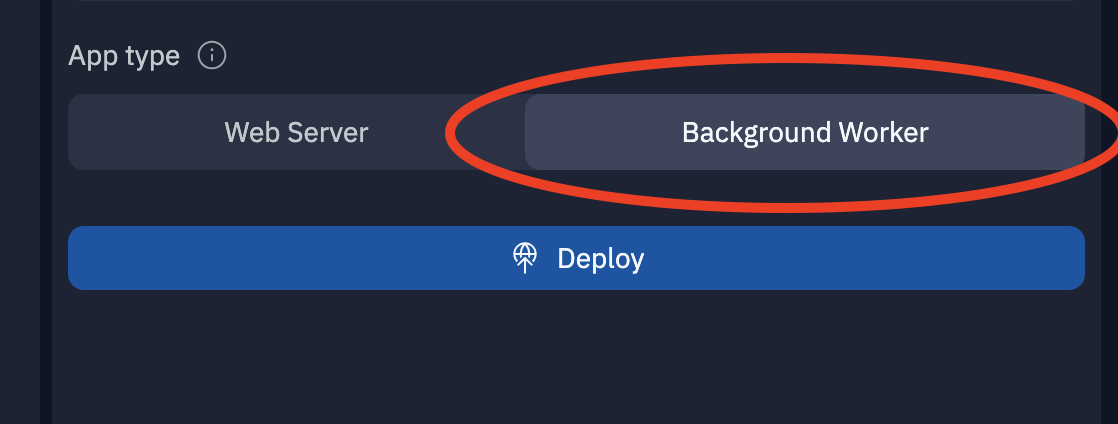
When prompted, choose "Background worker" as the app type. This step is crucial for ensuring proper execution. Then, click "Deploy." Once the deployment process begins, wait a few minutes for it to launch, then check your logs to confirm that everything is running smoothly.
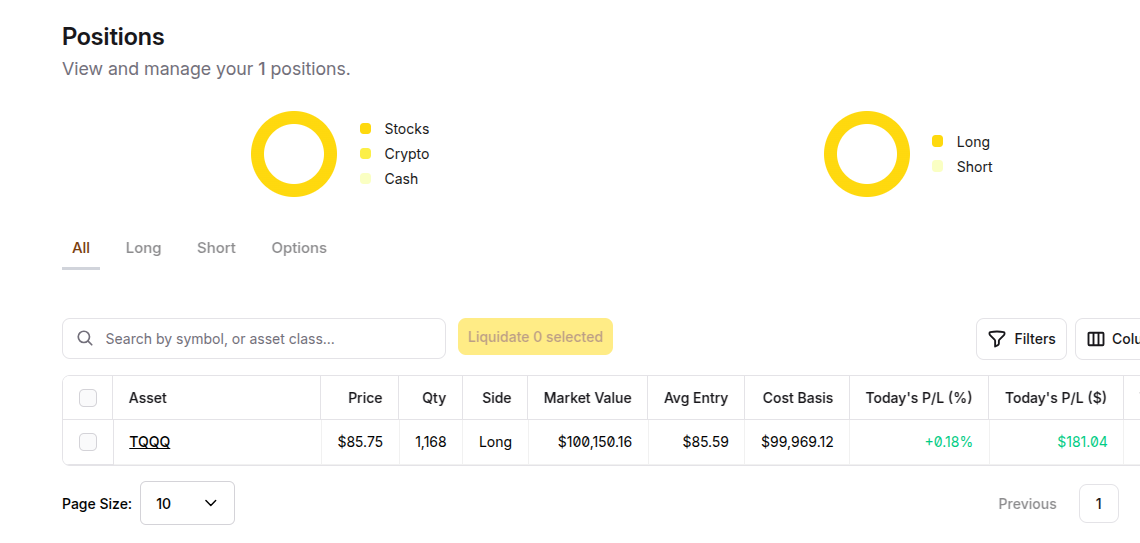
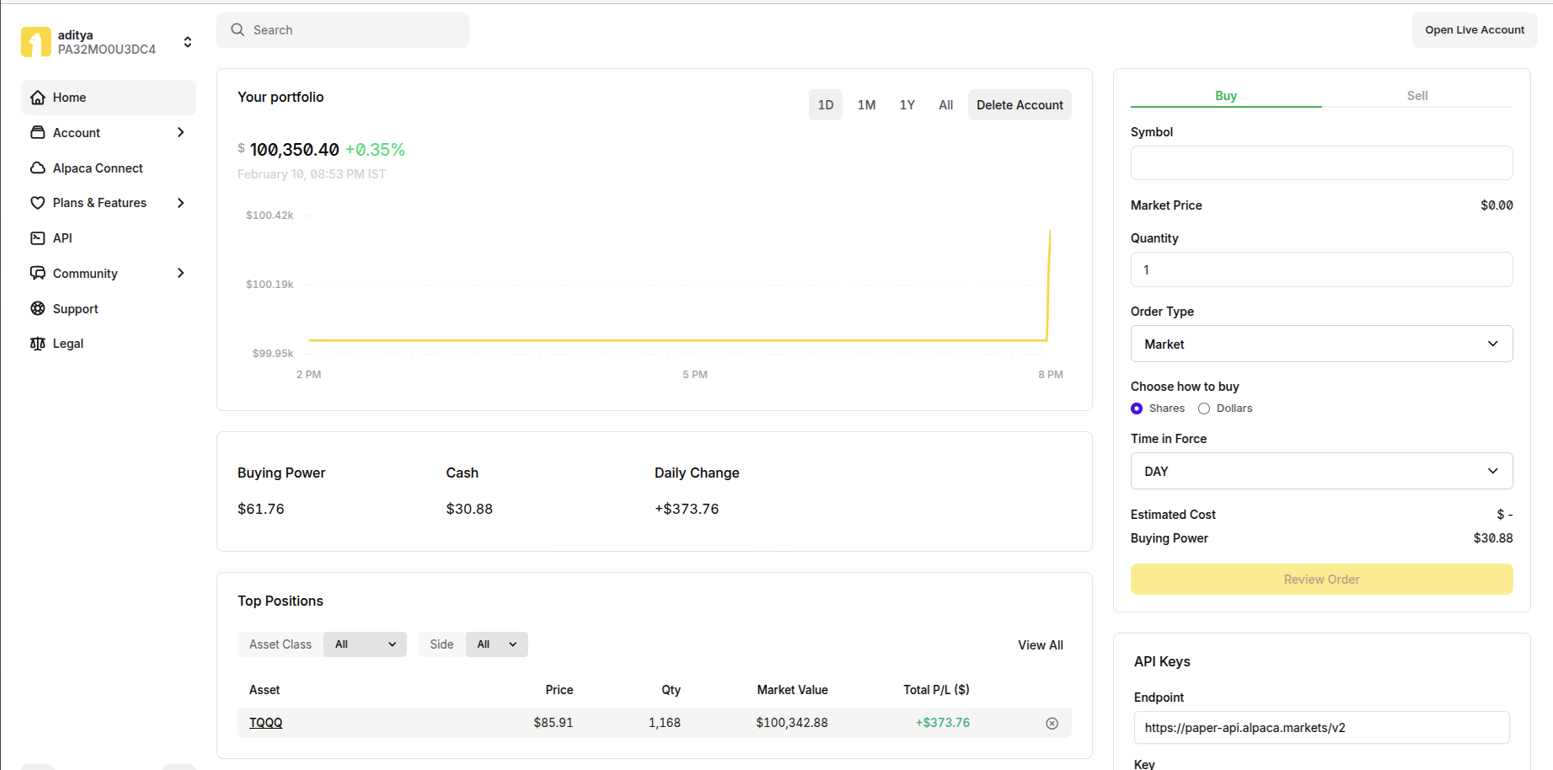
The original article included the following historical trading screens. This page does not establish the account mode, a current running bot, a complete date range, costs or drawdown for an independently verified live track record. For current setup, use the Alpaca connection guide and inspect the account, mode, permissions and strategy settings before approving a run.
Historical Trading Screens